Leather Furniture Oil: When to Use It and When to Skip It

The familiar advice to rub oil into a dry leather sofa can turn a small care problem into a stubborn stain. Leather furniture oil isn't automatically good care, and most upholstered leather shouldn't receive household oil at all. The smarter starting point is the finish, not the bottle.
A family recliner needs care that suits its upholstery, not a treatment borrowed from saddlery or work boots. Before adding anything, identify the leather, find its written care instructions, and decide whether conditioning is even necessary.
Table of Contents
- Which Leather Finishes Can Take Oil
- Why More Oil Can Harm Older Leather
- Oils to Avoid and What to Choose Instead
- How to Test and Apply Leather Oil Safely
- A Simple Leather Maintenance Schedule
- Confirm Your Leather Care Plan at Our Showroom
Which Leather Finishes Can Take Oil
Most furniture leather shouldn't be oiled routinely. Many sofas and recliners have coated or pigmented surfaces, so household oil may sit on top rather than absorb evenly. Even absorbent leather can develop unwanted color changes.
Leather furniture oil is a type of leather dressing, traditionally made with fats, oils, waxes, or combinations of those ingredients. The National Park Service's guidance on leather dressings explains their historical role in lubricating leather fibers, but also describes findings that dressings provided no preservative effect. Temporary softness isn't proof that a treatment will extend a sofa's life.
Can Each Leather Finish Take Oil?
Appearance provides useful clues, but the furniture maker's description should settle the identification. Corrected-grain describes surface processing rather than a separate finish category, so it can overlap with protected leather.
| Finish | How to Recognize It | Oil Safe? | Better Care |
|---|---|---|---|
| Aniline | Dyed through, soft, shows natural grain and marks easily | Rarely, only after a test | Gentle dusting and a cleaner made for aniline |
| Semi-aniline | Light protective layer, still shows natural markings | Sparingly, after a test | Dust and wipe with a barely damp cloth |
| Pigmented or protected | Even color, slight sheen, resists spills | Usually no | Follow the maker's care card; vacuum and spot-clean |
| Corrected-grain | Uniform, printed-looking grain on a coated surface | No | Wipe with a damp cloth; avoid oils |
| Nubuck | Sanded, velvety top surface | Never | Brush gently with a nubuck brush |
| Suede | Napped fibers across the face | Never | Brush with a suede brush and use suede-specific products |
The table isn't permission to experiment on an unidentified chair. A soft feel alone doesn't establish that leather is aniline, and a uniform grain doesn't reveal every detail of its protective coating.
Descriptions such as full-grain and top-grain also don't provide a complete care prescription. Understanding the difference between top-grain and full-grain leather helps separate hide construction from the finish that controls cleaning and product compatibility.
Practical rule: Read the maker's care card before testing anything beneath a cushion. A hidden location limits visible damage; it doesn't make an unsuitable product safe.
Oil is an option for a few aniline or semi-aniline pieces that need it and permit it, not a routine step for most living room furniture. When identification remains uncertain, gentle dry dusting is a better starting point than an experimental application.
Why More Oil Can Harm Older Leather
A shiny, soft-feeling sofa isn't automatically healthier leather. The finish may look richer immediately after treatment while excess dressing creates problems that become noticeable later.
The Western Australian Museum's leather treatment guidance gives approximate fat-and-oil requirements of 3–5% for archaeological and historic leather, compared with 10–12% for modern leather. Those are conservation figures, not dosing instructions for household upholstery. Their practical value is the warning: older material may need substantially less added lubricant, not a more generous coating.
Recognize Overload Before Adding More
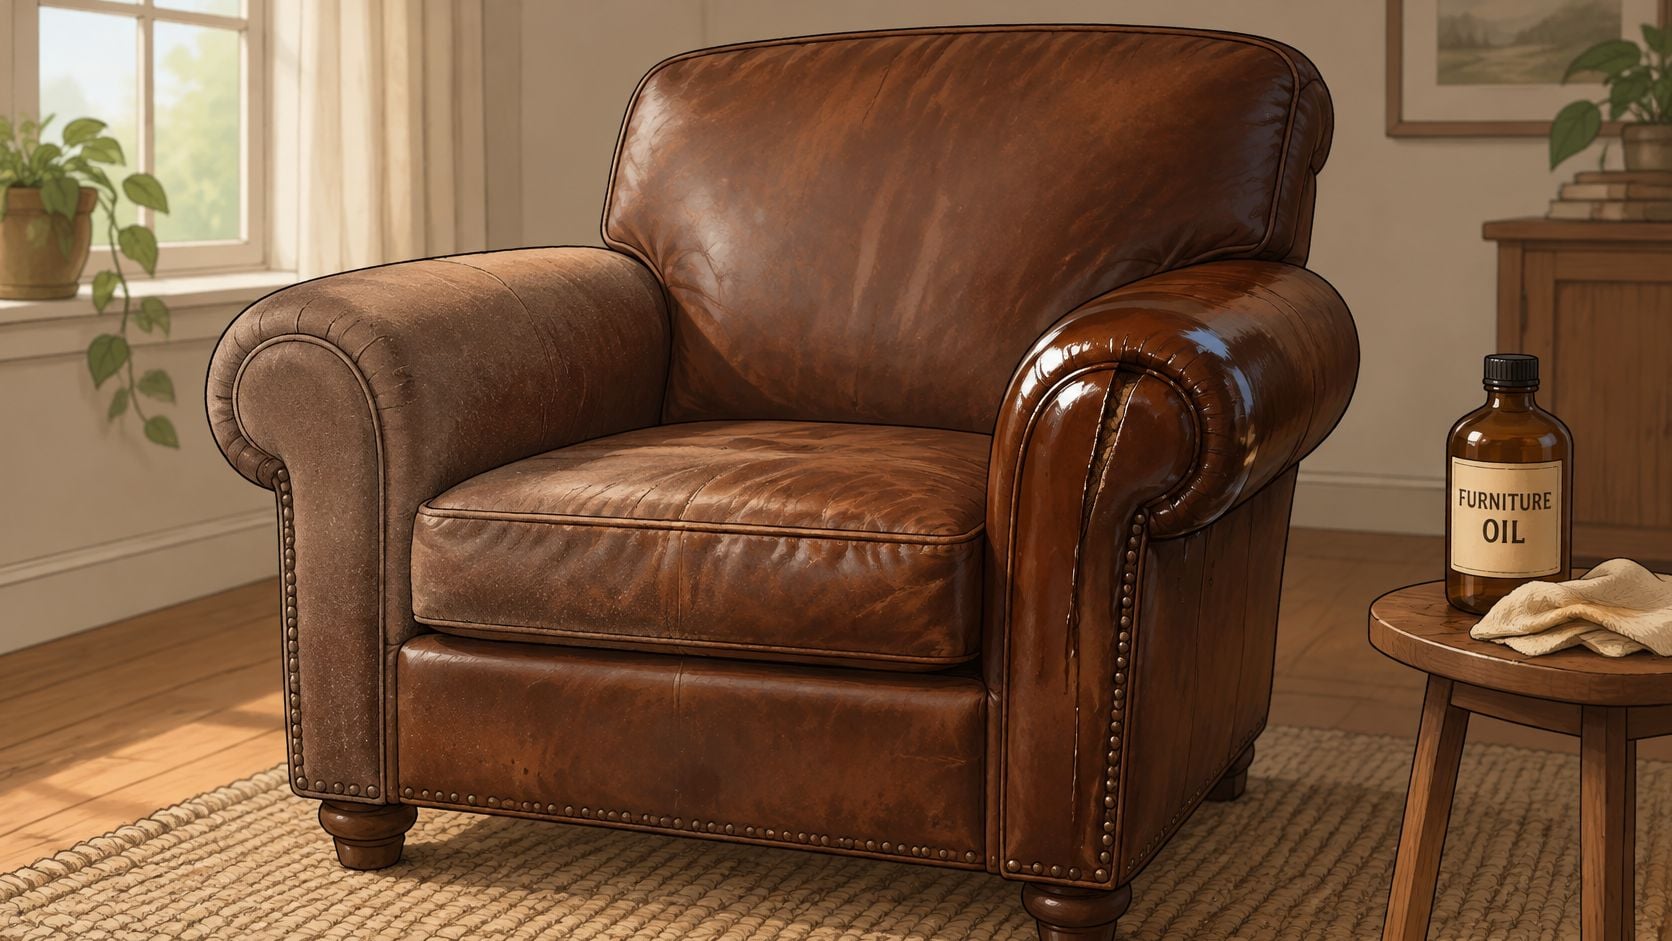
Excess oil can make leather repel moisture and eventually become hard and brittle. Fats can also migrate outward as fatty spew, a greasy surface deposit that may be mistaken for mold.
- Dust that sticks: Cushions collect debris instead of releasing it during gentle dusting.
- Uneven dark patches: Treated areas look noticeably different from neighboring panels.
- Tacky contact areas: Arms or seats feel sticky rather than comfortably supple.
Flaking deserves a different diagnosis. When a leather couch is peeling, adding lubricant won't rebuild a failing surface coating.
Judge maintenance by lasting stability, not the shine immediately after application.
For an older chair, begin with its surroundings and basic cleaning. Move it away from concentrated heat, address unusually dry indoor conditions, and remove loose dirt gently. Valuable, fragile, or badly stiffened upholstery deserves professional assessment before another treatment is added.
Oils to Avoid and What to Choose Instead
The kitchen cupboard is the wrong place to shop for leather care. Olive, coconut, and vegetable oils can produce an appealing initial sheen without providing a suitable long-term treatment for upholstery.
The leather-care reference on household oils describes oxidation, rancidity, persistent odor, and possible damage to collagen fibers from oxidized fatty acids. Advice for heavy tooled leather doesn't transfer neatly to a delicate sofa. Upholstery has different thicknesses, finishes, and expectations for contact with clothing.
Oils and Products for Leather Furniture
| Oil or Product | Good for Furniture? | Main Reason |
|---|---|---|
| Neatsfoot oil | Rarely | Can darken leather and make it too soft |
| Olive, coconut or vegetable oil | No | Can turn rancid, leave an odor and weaken fibers |
| Petroleum jelly or household lubricants | No | Leave greasy films that attract dust |
| Upholstery leather conditioner for the finish | Yes, after a test | Made for furniture leather; use sparingly |
| Aftermarket fabric or leather sprays | Check first | May add a film; read the label and warranty |
A finish-compatible upholstery conditioner is the better candidate when the maker allows conditioning. That doesn't mean every bottle labeled leather care belongs on every chair. Creams, dressings, and wax products serve different purposes, and the guidance on leather furniture wax can help distinguish a surface treatment from the care the upholstery needs.
Heavy animal oils deserve caution, too. A product intended to soften rugged tack can change the color and feel of already-soft furniture leather.
Check the Label Before Buying
- Furniture application: The label should specifically name upholstery or furniture leather, not merely leather goods.
- Finish compatibility: It should identify suitable finishes and exclusions, especially aniline, nubuck, and suede.
- Testing directions: Clear patch-test instructions should accompany the application method.
Aftermarket protection sprays require a separate warranty check. On upholstered furniture fabric, additional fabric protection applied by a store or customer voids the manufacturer's warranty, and many aftermarket sprays degrade fabric's durability and resiliency. Those fabric policies shouldn't be casually extended to leather, but mixed-material furniture makes the distinction important.
A spray isn't a harmless extra layer just because its packaging promises protection. Check the exact upholstery material and its paperwork before treating either the leather panels or neighboring fabric.
How to Test and Apply Leather Oil Safely
This routine applies only when the furniture maker permits the selected product. A successful patch test doesn't override a prohibition in the care instructions.
The leather-care application guidance recommends testing out of sight and putting a small amount on a cloth rather than directly onto leather. It also warns that excessive oil can darken the material, attract dust, and make it excessively soft. Treat any resulting color or texture change as potentially permanent.
Follow a Controlled Application Routine
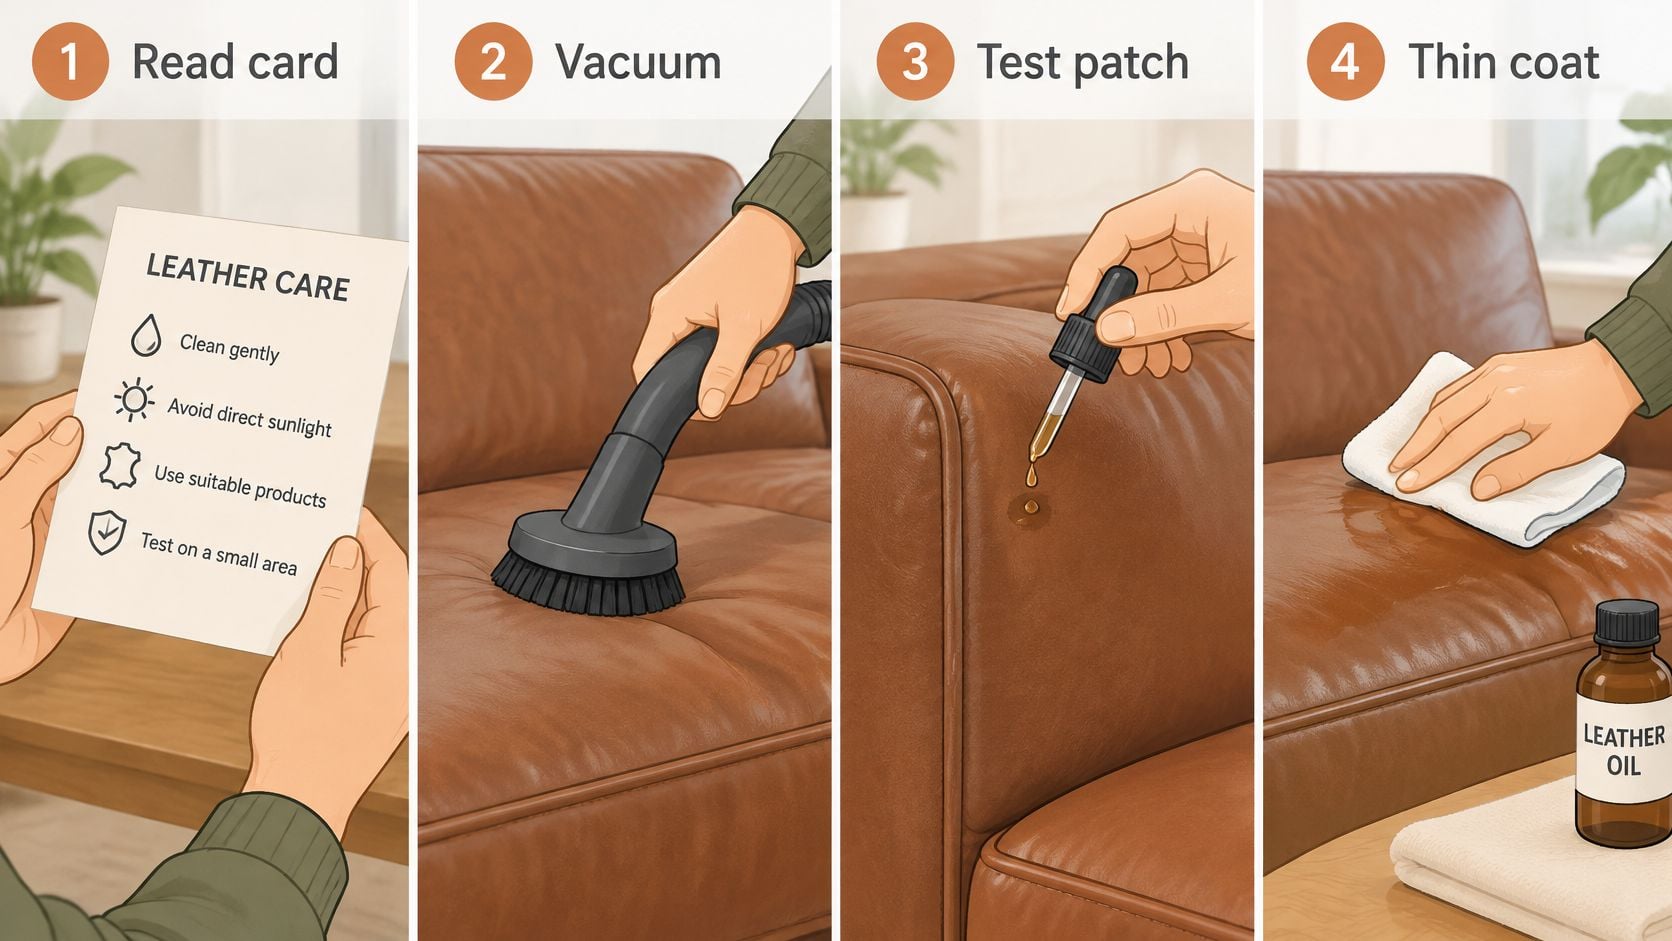
Confirm permission first. Read the maker's care card and the product directions together. If oil isn't allowed, stop rather than substituting another dressing.
Remove loose grit. Vacuum gently with a clean, soft brush attachment, paying attention to seams and cushion edges. Don't drag a hard nozzle across the upholstery.
Test an upholstered hidden area. Choose a small concealed patch of the same leather, such as the back edge of a removable cushion, not the dust-cover fabric underneath. Leave it overnight, or longer if the product directions require, before judging the result.
Inspect before proceeding. Compare the patch with untreated leather in daylight. Stop if it darkens unacceptably, becomes tacky, or changes texture.
Apply a thin film from a cloth. Put a very small amount on a clean, white, lint-free cloth and spread it gently with the grain. Pouring directly onto a cushion risks a concentrated dark spot.
Remove the surplus. Wipe with a separate dry cloth without forceful rubbing. Don't keep adding product because the surface doesn't look glossy.
Allow an undisturbed drying period. Leave the furniture overnight away from heaters and direct sun, extending that time when the label requires it. Check the treated surfaces in daylight before returning them to use.
Handle Cloths and Unexpected Results Carefully
Work in a ventilated room and keep children and pets away until the surface is fully dry. Never leave oily cloths crumpled in a pile, because some oils can generate heat as they oxidize. Spread cloths flat in a safe location away from combustible materials, or place them in an appropriate closed metal oily-waste container and follow local disposal guidance.
If accidental application leaves a sticky surface, gently remove excess with a dry cloth and stop. Don't add more oil, scrub with household degreaser, or use a heater to speed drying; persistent residue or staining needs a leather-care professional.
The fuller leather sofa conditioning routine can help organize preparation and drying. A satisfactory result has an even tone, no tackiness, and no greasy residue that could transfer to clothing.
A Simple Leather Maintenance Schedule
Consistent light care beats an occasional heavy treatment. A household schedule should prioritize dirt removal and inspection, with conditioning reserved for compatible leather that needs it.
The rhythm below is a practical starting point, not a replacement for the maker's instructions. Damp wiping applies only to finishes that permit it; suede, nubuck, and sensitive aniline need their own methods.
Leather Furniture Maintenance Schedule
| Task | How Often | Why It Matters |
|---|---|---|
| Vacuum with a soft brush | Weekly | Removes grit that scratches the finish |
| Wipe with a damp cloth and dry right away | Monthly | Lifts body oils and dirt |
| Keep away from direct sun and heaters | Ongoing | Heat and light dry and fade leather |
| Check for dryness, cracking or stiffness | Every 3 months | Early signs are easier to correct |
| Test and condition, if the finish allows | 1 to 2 times a year | Only when the leather feels dry |
| Professional cleaning for stains or buildup | As needed | Deep cleaning that home care cannot reach |
A calendar reminder should trigger an inspection, not an automatic application. If the leather remains supple and clean, leave the conditioner in the cupboard. A dry-feeling sofa in a heavily heated room may need a better indoor environment before it needs any product.
Make the Routine Easy to Keep
Keep a soft vacuum brush and clean white cloths accessible, along with the furniture's paperwork. Check armrests, headrests, and favorite seats carefully because frequent contact can leave localized buildup.
- After a spill: Blot promptly with a clean cloth rather than scrubbing.
- During inspection: Note new cracks, stiffness, or persistent discoloration before attempting treatment.
- Before changing products: Compare the proposed cleaner with the written care directions.
BILTRITE Furniture-Leather-Mattresses gives each customer written care information for wood, fabric, or leather furniture and mattresses. Keep that information with the purchase documents rather than relying on a generic internet routine.
The broader guide to caring for leather furniture provides a useful reference for everyday housekeeping. Stains that remain after permitted gentle cleaning are a reason to arrange professional help, not to increase product strength.
Confirm Your Leather Care Plan at Our Showroom
Name the finish before you open a bottle of leather oil. If you cannot, pause. Bring the care card, the label on the product you are considering, and clear photographs of the furniture. Those details are more useful than calling a chair brown leather.
BILTRITE Furniture-Leather-Mattresses is a fourth-generation, family-owned showroom in Greenfield, serving Metro Milwaukee since 1928. Sitting on a sofa tells you about comfort. It does not tell you whether the hide is aniline, semi-aniline, or a coated pigment finish. That distinction decides whether oil helps or darkens and softens the surface.
Plan a Hands-On Visit
The floor includes affordable, better-quality furniture: USA-made pieces, Amish-made solid wood, small-scale options, and heavy-duty furniture, plus 1000's of items in stock and 500 mattresses. Most pieces can be customized with your choice of fabric, leather, wood, finish, and hardware. I recommend using the visit as a finish check first. On many furniture hides, oil does more harm than a dry cloth and the care directions that came with the piece.
Tuesday through Thursday the showroom is open 10am to 6pm. Friday hours are 10am to 7pm, and Saturday hours are 10am to 5pm. It is closed Sunday and Monday. Call 414-238-2020 if you want to confirm someone can look at the photos with you.
You do not need every care question answered before you arrive. Bring the care card and a photo of the chair to the Greenfield showroom, and we can talk through the finish together. Visit BILTRITE Furniture-Leather-Mattresses to compare finishes, test comfort, and ask how that specific leather should be maintained.