Assembling a Bed Frame: Expert Tips for a Squeak-Free Setup


The new bed has arrived, the bedroom is cleared, and a pile of substantial wooden parts is waiting on the floor. Excitement can turn into hesitation quickly when the frame is heavy, the hardware looks unfamiliar, and the instructions seem to assume a second set of hands. Assembling a bed frame safely is less about force and more about sequence, alignment, and patience.
That matters even more with a solid-wood or Amish-made frame. A lightweight metal kit may tolerate a little movement during assembly, while heavier rails can lock a twist into the structure if bolts are tightened too soon. The bed frame has been a foundational piece of bedroom furniture for thousands of years, with evidence of raised sleeping platforms appearing more than 5,000 years ago, and the English name is documented between 1805 and 1815 according to the history of bed frames. Modern assembly may be far newer, but the basic purpose remains the same, support a mattress securely night after night.
Preparing Your Space and Tools for Success
A smooth assembly begins before the first bolt leaves its package. The safest approach is to unpack the frame in the bedroom where it will stay, provided there's enough room to work without forcing rails against walls or furniture. Moving a heavy finished frame through a hallway after assembly creates unnecessary risk for corners, flooring, and the frame itself. Families planning an upstairs move can also review these practical tips for moving heavy furniture upstairs before delivery day.
Lay down a clean moving blanket, cardboard sheet, or other protective surface. A hard, level floor helps the frame sit evenly while the joints are being fitted, while a soft protective layer keeps finished wood and metal edges away from scratches. Keep the headboard, footboard, side rails, center support, slats, and hardware within reach, but leave enough walking space to lift each part without twisting.
Sort the hardware before assembly
Open the packages carefully and group the hardware by type. Separate bolts, washers, nuts, brackets, feet, and caps into small containers or labeled piles. Then compare every piece with the parts list before construction begins.
A missing fastener is easier to identify on the floor than halfway through the build. It's also much easier to notice that two bolts have different lengths before one is installed in the wrong joint.
Use simple tools and avoid excess power
Most bed-frame manuals call for an Allen key or hex wrench and a Phillips screwdriver. Some specifically warn against power tools because excessive speed and torque can damage the frame or strip the hardware, as shown in this bed-frame assembly manual. A small level, tape measure, and flashlight can also help, especially in a dim bedroom.
Heavy rails and headboards should be lifted with help. A second person can steady the piece while another person starts the fasteners, reducing the chance of dropping a component or forcing a joint into place.
Self-assembly furniture is a large do-it-yourself category, but it isn't risk-free. A UK survey found that 52% of adults had assembled self-assembly furniture in the previous two years; among those assemblers, an estimated 3 million damaged an item, 1.8 million suffered a minor injury, and about 100,000 required medical attention. Those figures are reported in the academic discussion of errors and accidents in self-assembly products. Clear preparation helps keep a routine bedroom project routine.
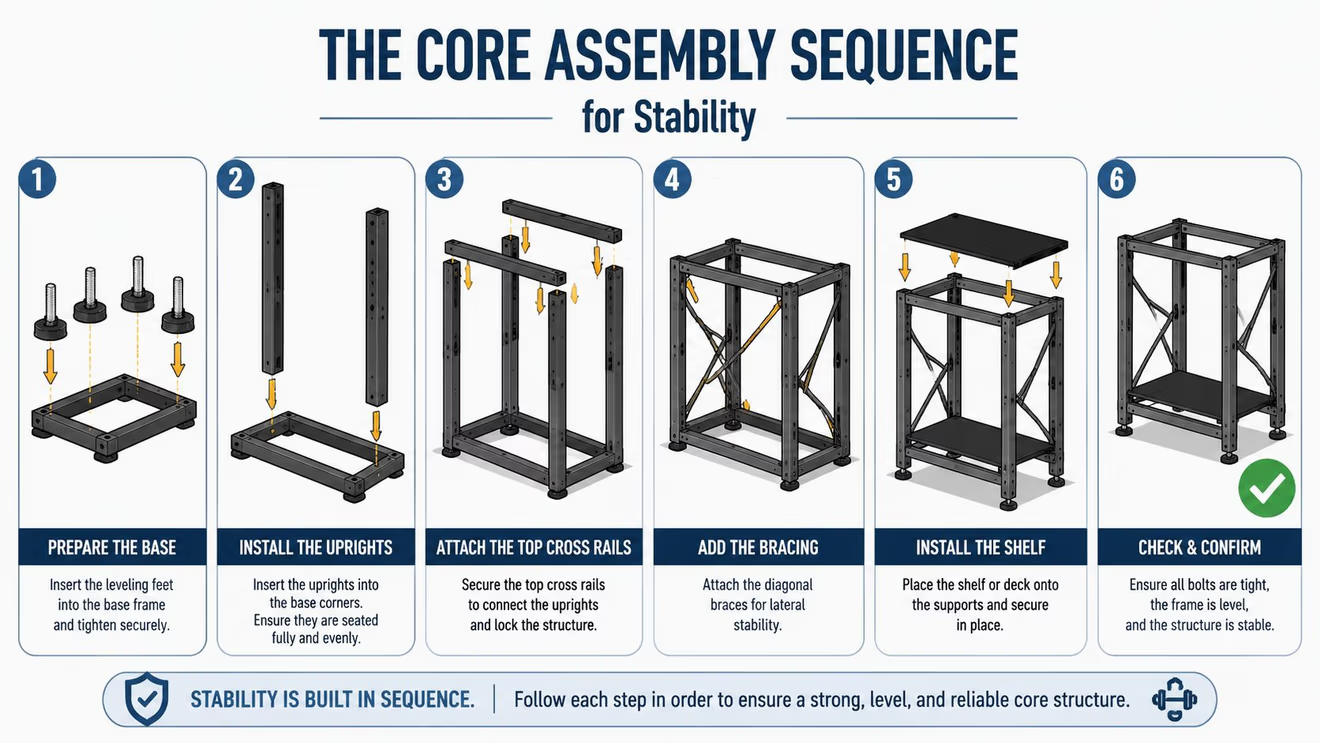
The Core Assembly Sequence for Stability
The order of assembly affects the final strength of the frame. The reliable sequence is to place the side rails parallel on a hard, flat surface, connect the headboard and footboard, install the center support, and add the slats only after the main structure has been aligned.
Build the main structure first
Start by identifying the left and right side rails. Set them parallel to each other, with the finished surfaces facing the correct direction and the headboard end positioned where it will connect. Attach the rails to the headboard first, then connect the footboard.
This creates a stable U-shape early in the process. The shape supports itself better than a loose collection of separate rails and gives the assembler a clear structure to square before the slats add weight.
At every joint, insert the fastener and turn it by hand. The bolt should engage smoothly. If it binds immediately, stop and check the washer, thread, bolt length, and rail orientation. Cross-threading can permanently damage the joint, and forcing it with a wrench won't correct the underlying problem.
Practical rule: Every major fastener should be hand-tightened first, not fully tightened.
Leave slight play in the joints while the main components are being connected. That small amount of movement allows the rails to settle into their natural position and lets the assembler correct small differences in alignment. This is especially important with heavy solid wood, where the parts may require more careful positioning than a thin metal kit.
Connect without locking in a twist
Once the headboard, side rails, and footboard are connected, install the center support or center rail according to the model's design. Don't load the slats yet. The support needs to be secured while the frame is still accessible, and its feet should be positioned for a firm connection with the floor.
The construction of a frame can vary widely, so learning the role of each rail, bracket, and support through the parts of a bed frame can prevent a part from being mistaken for a cosmetic accessory. A center rail isn't merely an extra piece of wood or metal. It can help transfer mattress load through the structure and reduce movement across the sleeping surface.
After the entire frame is connected, perform the first alignment check. Confirm that the rails sit at a consistent height, the headboard and footboard are upright, and the frame isn't visibly leaning. Only after that check should the fasteners receive their final tightening pass.
Squaring the Frame and Final Tightening
A frame can look assembled and still be out of square. If opposite corners aren't positioned evenly, the rails remain under uneven strain. That stress can show up later as wobble, squeaks, difficult slat installation, or a mattress support surface that doesn't sit evenly.
Heavy solid-wood frames deserve extra care here because their mass can make adjustment difficult once every joint has been locked down. The guidance on assembling a bed frame emphasizes the same practical principle, hand-tighten first, square the structure, and retighten only after the parts have seated correctly.
Use diagonal measurements
Measure from one corner of the frame to the opposite corner. Then measure the other diagonal. The measurements should match closely. If one diagonal is longer, the frame is shaped more like a parallelogram than a rectangle.
Correct the alignment before applying final torque:
- Loosen a joint slightly if the frame won't move.
- Shift the footboard or side rail gently until the diagonals are close.
- Check that the rails remain level and that the headboard and footboard haven't twisted.
- Tighten the fasteners gradually, alternating between joints rather than fully tightening one corner first.
This method works because the frame can settle as a complete structure instead of being forced into place one connection at a time. Over-tightening early can lock in a twist and make later correction harder, not easier.
Finish with an even tightening pass
Use the supplied wrench and steady hand pressure. A power tool can apply more force than the joint or finish can tolerate, so it isn't a shortcut worth taking. Stop when the fastener is secure and the joint is firm, rather than continuing until the hardware, wood, or bracket begins to deform.
The frame should feel stable before the slats are installed. Push gently at opposite corners and listen for movement. A small adjustment now is far simpler than diagnosing a squeak after the mattress, bedding, and nightstand are in place.
Joinery also deserves respect. The principles behind dowel construction in furniture show why accurate alignment matters in a well-built wood piece. A strong joint depends on parts meeting properly, not on brute force compensating for poor fit.
Installing Slats and Center Supports
The support system carries the mattress load, so slats and center supports shouldn't be treated as the last pieces to toss into place. Install the center rail or support assembly before the slats, then verify that any center legs make firm contact with the floor. A leg that hangs slightly above the floor won't contribute meaningful support until the frame settles, and that settling can create movement or noise.
Platform beds often use slats that rest in holders or caps. Traditional rail systems may use a different support arrangement, such as side ledges, cross rails, or a center beam. The exact design varies by model, which is why the guide to slatted bed frames should be matched with the manufacturer's instructions rather than treated as a universal parts list.
Place slats evenly
For wood slat systems, a common ventilation benchmark is about 1 to 2 inches between slats, according to practical bed-frame assembly guidance. Even spacing helps the mattress rest consistently and allows air to move beneath it. Slats should sit fully inside their holders or on their support ledges, with no rocking, sharp edge, or loose cap.
Slat counts aren't universal. One platform frame example uses 28 slats, while a queen frame example uses 20 slats, and the related manual tells users to insert each slat into its holder and confirm that it's secure. Those examples come from the platform-bed assembly documentation. The correct count is always the one specified for the particular frame.
Check the support path
Look beneath the center rail after the frame is tightened. Every adjustable foot should be set so it meets the floor without lifting the outside rails. If a support is extended too far, it can push the frame upward and create rocking. If it's too short, the center of the bed may remain unsupported.
Weight limits are equally important. Published manuals include examples of a bed frame rated up to 400 kg, a bunk-bed upper level limited to 175 pounds, and a full-size platform frame rated up to 500 pounds. The bed-frame user manual warns that exceeding the stated limit can result in structural damage or injury. Those figures aren't interchangeable, so the rating printed for the specific frame must control.
Troubleshooting Common Assembly Headaches
Most assembly problems have a simple cause, but the wrong correction can make them worse. A bolt that won't start may be cross-threaded, a hole that seems misaligned may reflect a frame that hasn't been squared, and a rocking bed may be sitting on an uneven floor rather than suffering from a bad joint.
Start with the least destructive solution. Remove the fastener, inspect the threads, and bring the parts together by hand. Never force a bolt through a misaligned hole with a power tool.
When a joint won't line up
Loosen the surrounding fasteners slightly, then bring the rails into position before trying the stubborn connection again. Check that washers are in the right location and that the rail hasn't been reversed. Once the bolt starts smoothly, leave it loose until the complete structure has been checked.
If a wooden joint still doesn't fit, inspect for packaging material, a damaged edge, or a misplaced bracket. Wood glue shouldn't be added to a bolted connection unless the manufacturer specifically calls for it. Glue can make a future repair difficult and may interfere with a designed knock-down joint.
When the frame rocks or squeaks
Test the bed from each corner. If the frame rocks only on one spot, check the floor and the adjustable foot before changing the frame's alignment. A thin, stable furniture shim can correct a minor floor variation, but it should be hidden under the appropriate support and shouldn't lift the rail away from the floor.
For noise, check the slats, center support, washers, and rail joints in that order. A loose slat holder can make a sharp rattle, while a slightly loose bolt may create a low creak as the frame carries weight. Thread-locking products should be used only when the manufacturer permits them, since they can complicate disassembly and may not suit every finish or fastener.
A final inspection after the first night of use can reveal settling. Recheck the joints, center support, and slat positions before assuming the frame has a structural defect.
When to Call in the Professionals
A heavy bed frame isn't always a good candidate for solo assembly. Large headboards, substantial solid-wood rails, narrow stairways, and rooms with delicate flooring all increase the value of extra hands and proper handling. Professional delivery and assembly can also protect an heirloom-quality finish from the accidental dents and scrapes that happen when a frame is turned in a tight hallway.
The decision isn't only about convenience. A professional crew brings the right lifting technique, keeps the frame supported while fasteners are started, and can identify a missing or damaged part before the furniture is fully installed. That saves the homeowner from discovering a problem after the mattress is in place.
Match the service to the furniture
A light metal kit may be manageable for two careful adults with a clear room. A heavy solid-wood or Amish-made frame may justify a delivery team, especially when the headboard is tall or the rails are difficult to maneuver. The BILTRITE furniture assembly service includes bedroom furniture such as bed frames, making professional setup an available option for customers who'd rather leave the lifting and alignment to experienced installers.
BILTRITE Furniture-Leather-Mattresses has served the Metro Milwaukee community as a fourth-generation, family-owned business since 1928. The store focuses on affordable, better-quality furniture, including USA-made, Amish-made, and solid-wood pieces, with options ranging from small-scale bedroom furniture to heavy-duty designs.
The showroom also has a large mattress department with over 60 models, along with a broad in-stock selection and a team of sales associates with over 400 years of combined experience. The goal is practical guidance, not pressure, whether a shopper needs help matching a mattress to a support system or choosing a frame that can handle a busy family bedroom.
Visit BILTRITE Furniture-Leather-Mattresses in Greenfield to see USA-made, Amish-made, solid-wood, and heavy-duty bed-frame options in person. The local team can help match the frame, mattress, delivery, and assembly choices to the room, so come on down and let the furniture experts handle the details with you.