


How to Refinish Wood Furniture: A Fun Family Guide
Refinishing a piece of wood furniture is a multi-step journey, but oh, what a rewarding one it is! You're looking at a process that starts with a thorough cleaning, moves on to stripping or sanding away the old finish, fixing up any dings or dents, and then finally, applying a new stain, paint, or protective topcoat. Think of it as a complete makeover for your furniture—a little effort up front pays off big time in the end!
Giving Your Wood Furniture a Fresh Start
Have you ever looked at an old piece of wood furniture and thought it deserved a second chance? Maybe it's a family heirloom showing its age, or a garage sale find with fantastic potential hiding under a tired finish. If that sounds familiar, you've come to the right place!
We’re the family behind BILTRITE Furniture, and we've been helping families create beautiful homes here in the Metro Milwaukee community since 1928. Taking on a refinishing project can seem like a big job, but it’s one of the most rewarding ways to restore character, match your current style, and breathe new life into a piece you love.
We want to be your friendly neighbor for this project, sharing four generations of hands-on knowledge. This guide will walk you through everything, step by step, with practical advice to help you feel confident. You can do this!
Why Bother with a DIY Project?
Let's be honest, tackling a project like this is about more than just saving money. It’s about putting your own stamp on your home. You're not just fixing up a table; you’re preserving its story while adding a new chapter that is uniquely yours. There's a special kind of pride that comes from seeing that incredible transformation happen right before your eyes.
You're also doing something great for the planet! Giving an old piece a new purpose is a fantastic way to keep quality furniture out of the landfill and embrace sustainability. In fact, the whole idea of repairing instead of replacing is gaining momentum—so much so that the market for these services is expected to grow. It's a choice you can feel great about.
What You Will Learn Here
We’ve put this guide together to be your complete resource, whether this is your first time or you’re a seasoned pro. We're going to cover all the bases:
- Evaluating Your Piece: First, we'll help you figure out if your furniture is a good candidate for refinishing.
- Gathering Your Supplies: We'll break down the essential tools you'll need and what's just nice to have.
- The Nitty-Gritty Prep Work: This covers everything from cleaning and stripping to getting that beautifully smooth sanded surface.
- The Fun Part – Finishing: Time to apply that beautiful new stain or paint for a stunning new look.
For nearly a century, our family has helped Milwaukee families find quality pieces for their homes, specializing in affordable, better-quality USA and Amish-made furniture. While this guide is here to fuel your DIY spirit, we hope our passion for great wood furniture shines through. Let's get started!
Deciding to Refinish or Find Something New
Before you clear out the garage and start hunting for sandpaper, let's talk about whether refinishing your old furniture is actually the right move. We love a good DIY project as much as anyone, but after decades in this business, we've seen enough pieces to know that not every item is a great candidate. It's really about making a choice your family will be happy with for years to come.
The first thing to look at is what your piece is made of. Is it solid wood, like the beautiful Amish and USA-made furniture we specialize in at our store? Or is it a delicate veneer, which is just a thin layer of decorative wood glued to a less expensive core? Solid wood is incredibly forgiving—you can sand and refinish it multiple times. Veneer, on the other hand, requires a much, much gentler touch.
Evaluating Your Furniture's Potential
Next, take an honest look at its overall condition. A few scratches or a dull finish? No problem. But deep gouges, wobbly legs, or significant structural damage might need more than a cosmetic fix. Those kinds of repairs can add a ton of time and complexity to your project.
You also have to weigh its sentimental value. A dining table that’s been in your family for generations might be worth every ounce of effort, no matter the condition. But if it's a piece without a personal story, you have to ask yourself: is the time and money you'll spend actually worth it? Refinishing is a true labor of love! We have a few more tips on our blog to help you think through various DIY furniture repair projects you might run into.
At BILTRITE, we believe in furniture that lasts. Since 1928, our family has focused on offering affordable, better-quality pieces that become new heirlooms. Sometimes, investing in a new piece that’s built to last is a smarter, more satisfying choice than sinking hours into a difficult restoration.
The Refinish or Replace Dilemma
Looking at the bigger picture can also help. While the furniture repair industry is still going strong, there's a definite trend showing that as the price gap between new and refurbished items shrinks, more people are choosing to buy new. You can read more about the furniture repair market trends on ibisworld.com. This doesn't mean you shouldn't refinish your piece, it just means it's important to be realistic about the value you're adding versus the cost and your own effort.
To help you sort through it all, we put together a quick guide.
Refinish or Replace Decision Guide
This quick comparison can help you decide if your furniture piece is a better candidate for a DIY refinish or if it's time to visit our showroom.
| Consideration | Good Candidate to Refinish | Consider Buying New |
|---|---|---|
| Material Quality | The piece is made of solid wood with beautiful grain hidden under the old finish. | The furniture is made of particleboard or has a very thin, damaged veneer. |
| Structural Integrity | It's sturdy and well-built with strong joints, needing only minor cosmetic fixes. | It has wobbly legs, broken parts, or significant structural damage that's hard to fix. |
| Sentimental Value | It's a cherished family heirloom with a story you want to preserve. | It's a piece you don't have a strong attachment to, and you're just looking for a change. |
| Time & Effort | You enjoy DIY projects and have the weekend time to dedicate to the process. | Your schedule is packed, and the thought of a multi-day project feels overwhelming. |
Ultimately, the choice is yours! Whether you decide to roll up your sleeves or come find a new treasure, the goal is to have furniture in your home that you truly love. If you decide a new piece is the way to go, we’d be thrilled to see you in our Greenfield showroom. We don't sell online because we believe in that personal touch, so come say hi and let our family help yours!
Gathering Tools and Setting Up Your Workspace
Alright, you've decided to breathe new life into a piece of furniture—we love that! Before you start stripping and sanding, a little bit of prep work will make the entire project go so much more smoothly. Think of it like cooking a big family meal; you wouldn't start without getting your ingredients out and your kitchen organized first.
The first step is carving out a dedicated, safe spot to work. This doesn't have to be a professional-grade woodshop. A corner of the garage, a basement with good airflow, or even a covered patio on a nice day can work great. The goal is to protect your home from dust and fumes and to keep your family and pets safely out of the way. Lay down some old sheets or a canvas drop cloth to catch any drips or dust.
Your Essential Tool and Supply List
Next up, let's get your gear in order. You don't need to break the bank, but investing in a few quality items will absolutely make the job easier and give you a much better final result. Here's a rundown of what we recommend having on hand before you even think about touching that piece of furniture.
For Safety First (This is Non-Negotiable!)
- Safety Goggles: Protect your eyes from chemical splashes and flying debris.
- Respirator or Dust Mask: This is crucial. It keeps chemical fumes and fine sanding dust out of your lungs.
- Chemical-Resistant Gloves: Don't just grab any old gloves. Standard latex won't hold up against chemical strippers. You'll want nitrile or butyl rubber gloves.
For Prepping the Surface
- Chemical Stripper: A gel or paste formula is usually best, as it clings to vertical surfaces without dripping everywhere.
- Plastic Scraper & Metal Putty Knife: For gently lifting away the old finish after the stripper does its magic.
- Sandpaper (Multiple Grits): You'll need a range. Start with a coarser grit like 120 to remove stubborn finish, and move up to a fine grit like 220 for that silky-smooth final sanding.
- Orbital Sander: While you can sand by hand, an electric sander is a game-changer, especially for big, flat surfaces like a tabletop. It saves so much time and effort.
- Tack Cloths: These sticky little cloths are amazing for picking up every last speck of sanding dust before you apply your finish.
- Mineral Spirits: Great for a final wipe-down of the wood after stripping and before you start staining or painting.
For Applying the New Finish
- High-Quality Brushes: Invest in good natural bristle brushes for oil-based finishes and quality synthetic brushes for water-based ones. A cheap brush will shed bristles right into your beautiful new finish, and that's a headache you don't need!
- Lint-Free Rags: Old cotton t-shirts work great for applying stain and wiping off the excess.
- Your Choice of Finish: This is the fun part! It could be a wood stain, paint, polyurethane, wax, or oil.
A friendly tip from our family to yours: Save money where you can by using old rags and empty containers you have at home. But please, don't skimp on your safety gear or your finishing brushes. Quality in these specific areas really pays off in the end.
Creating a Safe and Efficient Workspace
Now that you've got your supplies, let's talk about the space itself. Good ventilation is your absolute best friend when working with strippers and finishes. If you're working inside, open up the windows and set up a fan to pull fumes outside. In a garage, crack that main door open.
Keep your tools organized. Have a designated spot for your stripping gear, another for your sanding tools, and a third for your finishing products. This simple habit keeps you from scrambling to find something mid-process and helps the whole project flow.
Lastly, make sure you have good lighting. You need to be able to see any imperfections, spot drips before they dry, and make sure your stain is going on evenly. If your workspace is a bit dim, grab a portable work light. Taking these prep steps seriously sets you up for a successful project and a piece you'll be proud of for years to come.
Prepping Your Furniture for Its New Look
This is where the real transformation begins. Any seasoned refinisher will tell you that the secret to a flawless, professional-looking result isn’t the final coat of varnish—it’s the prep work. It might not be the most glamorous part of the project, but getting this stage right makes every other step smoother and leads to a finish you’ll be proud of for years.
We’re going to walk through the three crucial phases of prepping your furniture: giving it a deep clean, stripping off the old finish, and sanding it down to a beautiful, smooth canvas.
Before you dive in, a quick setup makes all the difference. Get your safety gear on, lay out your tools, and make sure your workspace is protected.
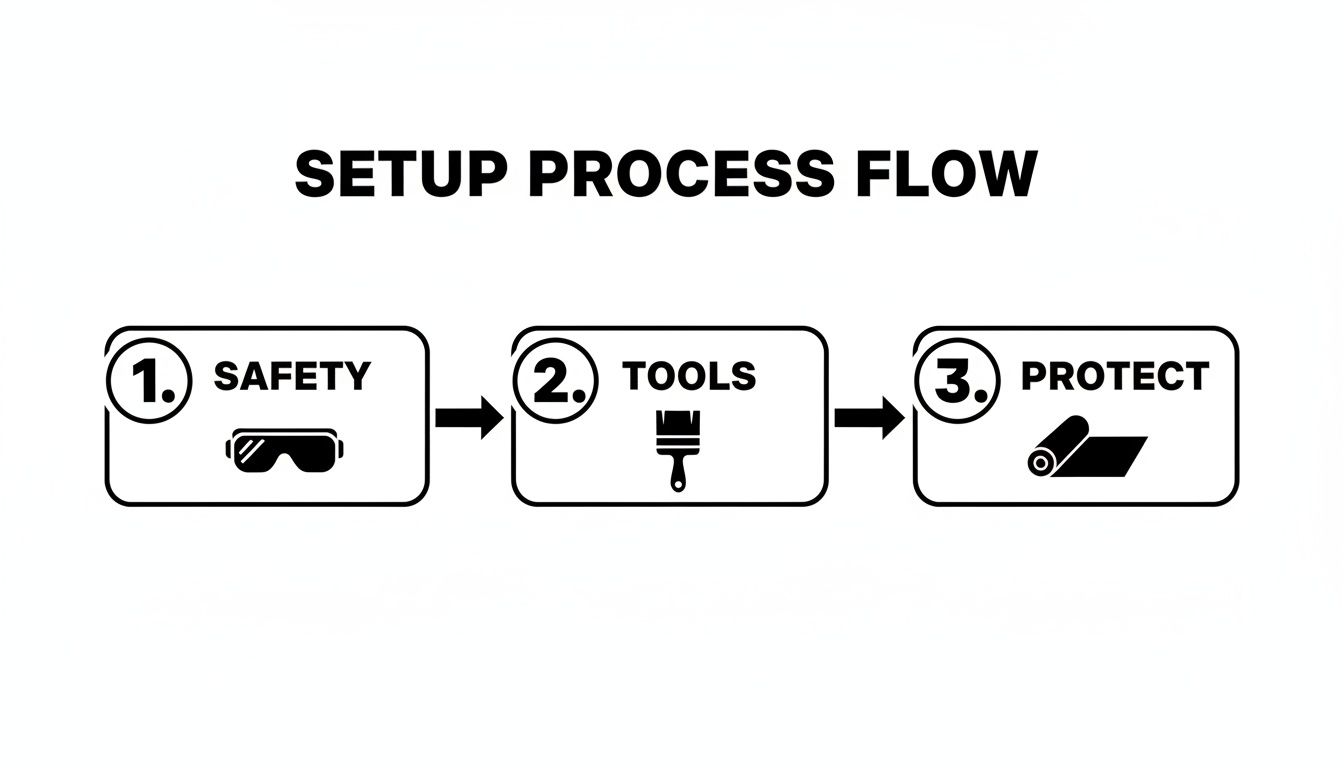
Starting this way ensures you, your home, and your project stay safe and clean from the get-go.
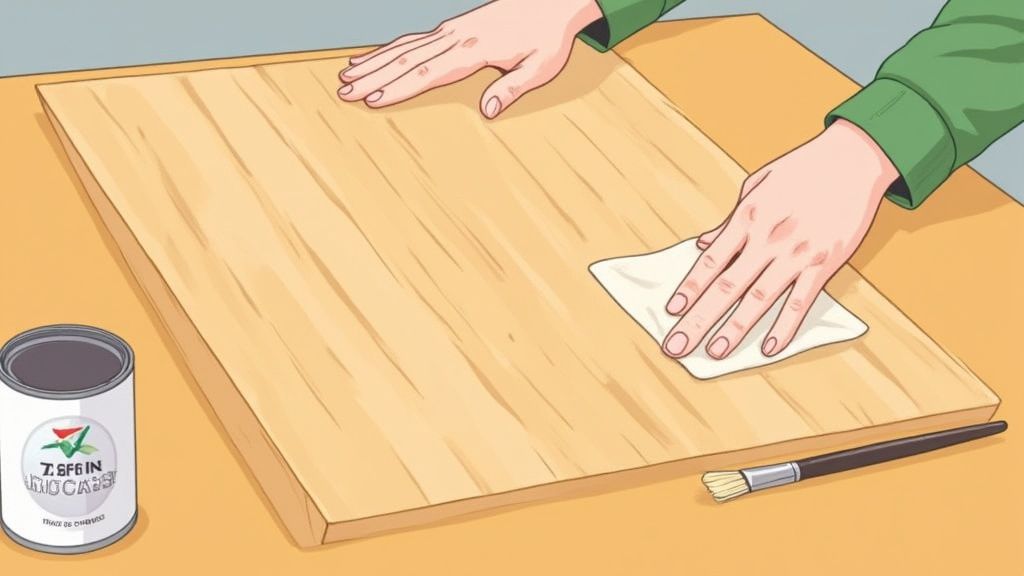
Giving It a Good Scrub Down
First things first: your piece needs a thorough cleaning. You'd be shocked at the decades of dirt, furniture polish, and finger oils that can build up on a surface. Trying to sand or strip over that layer of grime is a shortcut to a blotchy, uneven finish that just won't stick properly.
For this job, you'll want something stronger than soap and water. A heavy-duty furniture cleaner or a solution of mineral spirits will cut through the buildup. Just follow the product's directions, use a soft cloth, and make sure you get into all the detailed carvings and corners.
Once it's clean, wipe everything down with a fresh cloth dampened with water to remove any leftover residue. Then, let it dry completely. For a deeper dive into getting your furniture spotless, check out our guide on how to clean wood furniture properly.
Time to Strip Away the Old Finish
With your furniture clean and dry, it’s time to deal with the old finish. You’ve got two main routes here: chemical strippers or good old-fashioned sanding. If you’re tackling a piece with thick layers of paint or a stubborn old varnish, a chemical stripper is almost always the more efficient path.
Using a Chemical Stripper Safely
- Pick the Right Product: We find that gel or paste strippers are the easiest to work with. They cling to vertical surfaces without dripping everywhere, which means less mess. Always double-check the label to make sure it’s safe for wood.
- Apply It Liberally: Put on your safety gear and find a well-ventilated space—outdoors is ideal. Use a cheap, disposable paintbrush to slather on a thick, even layer of the stripper. This is not the time to be stingy!
- Give It Time: The instructions will give you a timeframe, but you’ll know it’s working when you see the old finish start to bubble and wrinkle.
- Scrape It Clean: A plastic scraper is best for gently lifting off the softened gunk. For tricky corners or detailed areas, a stiff brush, a metal putty knife, or even an old dental pick can be a huge help—just be careful not to gouge the wood underneath.
Sanding for a Silky-Smooth Surface
Whether you just stripped the piece or are starting with a factory finish that’s in decent shape, sanding is the final—and most important—step. It erases any leftover imperfections and opens up the wood’s pores, allowing them to absorb the new stain or paint evenly.
Start with medium-grit sandpaper, something around 120-grit, to remove any remaining finish and smooth out light scratches. For big, flat areas like a tabletop or the sides of a dresser, an orbital sander is a massive time-saver. Just remember to always move with the grain of the wood to avoid leaving behind ugly swirl marks.
After your first pass, wipe away all the dust with a tack cloth. Now, switch to a finer paper, like 220-grit, for the final sanding. This is what will give you that incredibly smooth, touchable surface that’s the hallmark of a great job.
Quick Tip for Veneers: Be extra cautious if you're working on a veneered piece. Veneer is just a very thin layer of wood, and it’s easy to sand right through it if you’re too aggressive. Always sand veneers by hand with light, even pressure.
Once you’re satisfied with the smoothness, give the entire piece a final, meticulous wipe-down with a tack cloth. You want it completely free of any dust. Now, you can stand back and appreciate your hard work. You’ve created an amazing blank slate, and the really fun part is right around the corner.
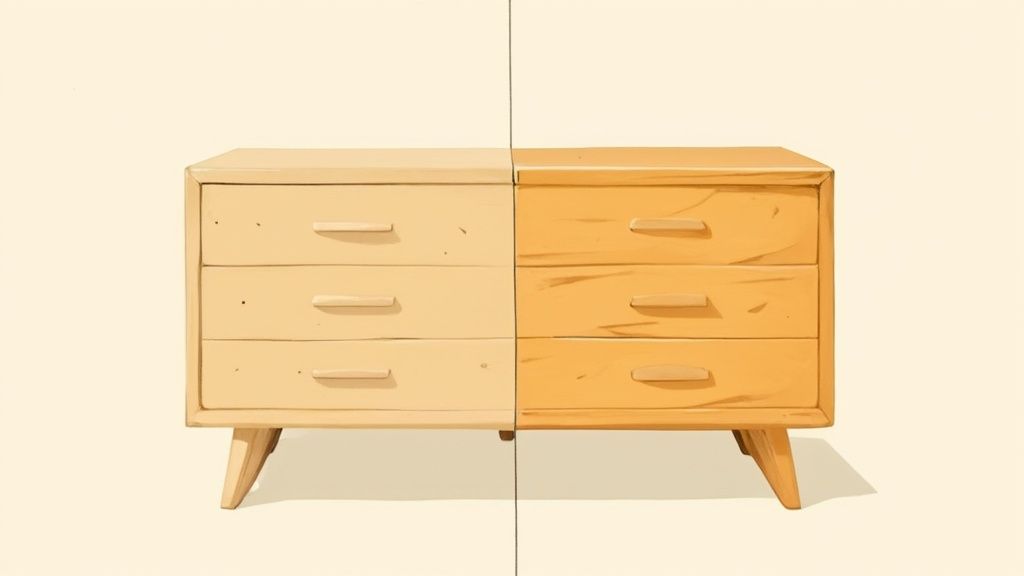
Applying Stain, Paint, or a New Finish
This is the moment we've all been waiting for—the part where all your hard work starts to pay off and your furniture’s new personality shines through! Choosing and applying the right finish is where you truly make a piece your own.
Whether you're aiming for a classic look that celebrates the wood grain or a bold, modern statement, this is your chance to get creative. Your finish choice sets the tone. A rich stain can highlight the gorgeous patterns in oak or cherry, while a pop of paint can turn a simple piece into the star of the room. Let's get a result you'll be excited to show off!
Choosing the Right Finish for Your Piece
The first big decision is whether to go with stain or paint. A wood stain is designed to soak into the wood, enhancing its natural grain and color. Paint, on the other hand, sits on top, creating an opaque, solid-colored surface.
If you’ve uncovered some beautiful wood grain during the prep phase, a stain is a fantastic way to showcase it. Gel stains are a great option for beginners because their thicker consistency makes them easier to control with less dripping. If you’re dealing with a wood that doesn't have a particularly interesting grain or has a few too many imperfections to hide, paint can be your best friend.
A friendly tip from our team: Always, always test your stain or paint on a hidden spot first, like the underside of a tabletop or the back of a leg. Colors can look surprisingly different once they are on the actual wood, so a quick test can save you from a big surprise later on!
Techniques for a Flawless Application
Once you've picked your finish, getting it onto the furniture smoothly is key. Rushing this step can lead to drips, streaks, and bubbles that undermine all your careful prep work.
Applying Stain Evenly
- Wipe On, Wipe Off: For most stains, the best method is to apply it with a lint-free rag (an old t-shirt works wonders!). Work in sections, applying the stain in the direction of the wood grain.
- Let It Sit (But Not for Too Long!): Allow the stain to penetrate the wood for a few minutes—check the can for specific timing. The longer you let it sit, the darker the color will be.
- Wipe Away the Excess: Use a clean rag to wipe off any excess stain. This is a crucial step for avoiding a sticky, uneven finish. If you want a deeper color, you can always apply a second coat after the first one is dry.
Getting a Smooth Paint Finish
- Use a Quality Brush: Investing in a good paintbrush makes a world of difference. A quality synthetic brush will give you a much smoother finish with water-based paints.
- Long, Even Strokes: Apply the paint using long, smooth strokes that follow the wood grain. Try not to go back and forth over the same spot too many times, as this can create brush marks.
- Light Coats are Best: It's much better to apply two or three thin coats of paint than one thick, goopy one. This helps prevent drips and allows the paint to cure properly, creating a more durable finish.
Protecting Your Hard Work with a Top Coat
You’re almost at the finish line! The final step is applying a protective top coat. This is a non-negotiable step that seals your finish and protects the furniture from scratches, spills, and everyday family life. A good top coat is what makes your hard work last.
Picking the right protective finish can feel overwhelming, but it really comes down to how you plan to use the piece. A high-traffic kitchen table needs a different level of defense than a decorative side table.
Here’s a quick breakdown to help you decide.
Choosing Your Wood Finish
| Finish Type | Best For | Durability Level | Application Tip |
|---|---|---|---|
| Polyurethane | Tabletops, desks, high-use surfaces | High | Apply thin coats; lightly sand with 220-grit paper between coats for a glass-smooth feel. |
| Spar Urethane | Outdoor furniture, items exposed to moisture | Very High | Designed to expand and contract with wood; contains UV blockers to prevent sun damage. |
| Lacquer | Modern or professional-looking finishes | Medium-High | Dries very fast and provides a hard, glossy surface. Best applied by spraying. |
| Finishing Wax | Antique pieces, low-use decorative items | Low | Creates a soft, natural sheen. Easy to apply but needs to be reapplied periodically. |
| Tung Oil | Food-safe surfaces, natural wood look | Medium | Penetrates the wood to protect from within. Requires multiple coats and longer drying times. |
Each of these has its place, but for most indoor family furniture, a good polyurethane is a reliable workhorse that will keep your piece looking great for years.
Applying a top coat is much like painting—use a quality brush and apply thin, even coats, lightly sanding between each one for the smoothest possible result. For even more great tips, you can explore our ultimate guide to protecting wood furniture from daily wear and tear.
When Your Project Needs a Helping Hand
Sometimes a DIY project starts to feel a bit bigger than you first imagined. Or maybe you're looking at a priceless family heirloom that really deserves an expert's touch.
Knowing when to call for backup is a smart move, and there's absolutely no shame in it! Your time is valuable, too.
While we focus on selling beautiful, ready-to-love furniture, our family has been part of the Metro Milwaukee community since 1928. We're always happy to point you toward some talented local craftspeople who do amazing restoration work.
Of course, if you decide a new piece is the better route, we’d love for you to visit us in our Greenfield showroom! Our awesome team has over 400 years of combined experience and is here to help you find a quality piece your family will cherish—no pressure, ever. We're proud to be a local business that's closed on Sundays so our team can be with their families!
We have a lot of great information on maintaining the beauty of your furniture, and you can explore more of our advice on wood furniture care right on our blog. Whether you refinish or replace, we're here to help you love your home even more.
Common Questions About Refinishing Furniture
We get a lot of questions from friends and neighbors about furniture projects, so we've gathered a few common ones here. After being in the furniture business in Metro Milwaukee since 1928, our family has heard it all! This should help clear up any lingering doubts before you get started.
One of the most frequent questions we hear is, "Do I really need to use a chemical stripper?" The honest answer is: it depends. If your piece has many thick layers of old paint, a chemical stripper will save you hours of sanding and a lot of frustration. For a piece with just a thin, old varnish, though, you can often get away with just sanding it off.
Can I Paint Directly Over the Old Finish?
This is another popular one, especially from folks looking to save time. While some specialty "all-in-one" paints claim you can, we've always found that the best, most durable results come from proper prep.
At a minimum, you should thoroughly clean the piece and then scuff sand the entire surface. This gives the new paint a good, clean surface to grip onto, preventing chips and peeling down the road.
Think of it like this: you wouldn't paint a wall without cleaning it first, right? The same principle applies to furniture. A little bit of prep goes a long, long way in making your hard work last for your family to enjoy.
What Is the Best Top Coat for Durability?
For furniture that will see a lot of daily use—like a kitchen table or a family room coffee table—you want a finish that can stand up to spills, heat, and activity. Our go-to recommendation for most indoor projects is an oil-based or water-based polyurethane.
It provides a tough, protective layer that's much more resilient than softer finishes like wax. Just be sure to apply it in thin, even coats for the best result!
If you're dealing with pesky white rings on a piece you're not ready to refinish yet, we have some great tips on how to remove water stains from wood that might save you some trouble.
How Long Does the Whole Process Take?
Refinishing wood furniture is definitely more of a marathon than a sprint! Rushing the process is the quickest way to get a result you're not happy with.
You need to account for the time it takes for stripper to work, for multiple coats of stain or paint to dry, and especially for the top coat to fully cure. A good rule of thumb is to plan for it to be a weekend project at the very least, but a larger or more complicated piece could easily take longer. Patience is your best tool for this job!
We hope this guide has inspired you to tackle your own project! If you decide a new piece is the better fit for your home, our family at BILTRITE Furniture-Leather-Mattresses would love to help you find it. We'd love to see you in our store! Come say hi and let us help you find an amazing piece for your home.